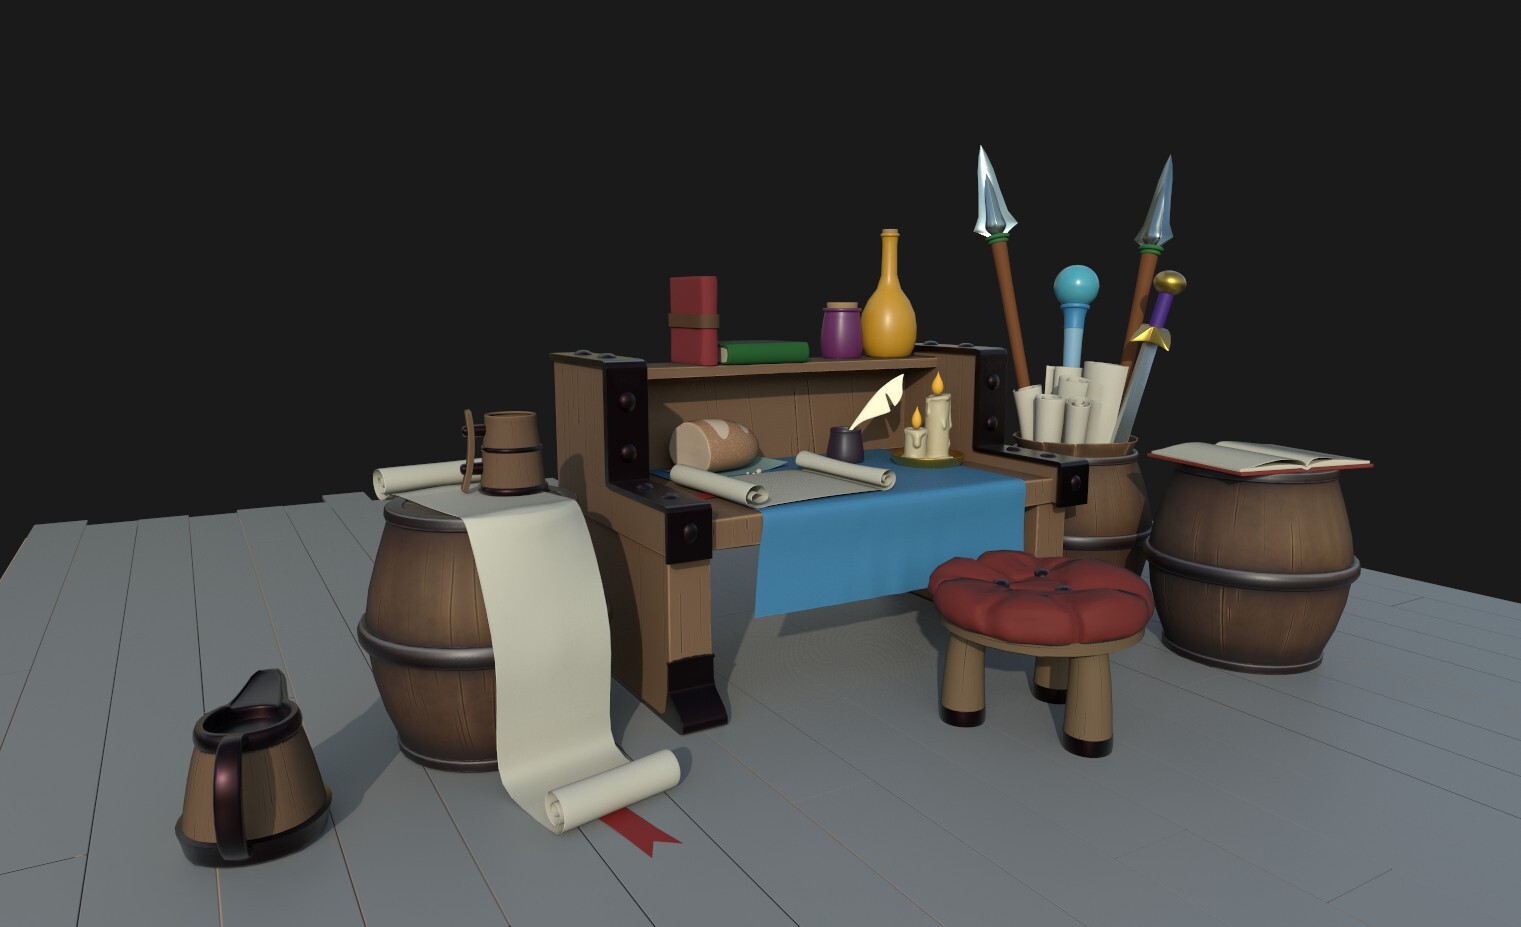
Hello everyone! Here is another update on my Scribe Desk environment (just 3 months later). I've pretty much finished up the texturing process and exported all of my textures into Marmoset Toolbag 4 to begin the lighting process and take advantage of the ray tracing capabilities. I will eventually take this scene into Unreal Engine Early Access and begin lighting in there to mess around with Lumen and provide lighting comparisons, but I will just show my lighting process in Marmoset for now until the next update.
Before beginning the lighting process, I wanted to do some research on what sort of lighting scenario would fit this scene well. I ultimately decided to go with some evening tavern/inn lighting (mainly drawn inspiration from the Witcher 3 taverns) with mostly warmer tones and a small splash of a light blue overhead light that would emulate sort of the night sky from above.
I started off with two warm toned rim lights (yellowish white and very light red) and a bright golden key light opposite of my rim lights that will act as my main light source. I adjusted the width and height of my key light to soften the shadows and gave my key light a brighter golden tone to bring in some warmth to the scene. During the process, I adjusted the key light brightness a lot to make sure I didn't wash out the scene from the lighting being too bright or didn't make the scene too dark to where it becomes unreadable and the viewer can't see or make out anything.

Process Screen #1 - Key and Rim Lighting
After placing in the rim and key lights, I placed a bright red fill light and adjusted the brightness as needed to fill in any very dark areas and bring in some more warmth into the scene. I also removed the cast shadows option on the fill light to remove any unwanted shadows that clashed with the key light shadows or caused any artifacting. I also added a very light blue overhead light to help mitigate some of the really powerful warm tones and to emulate that night sky light seeping through a little bit. I also adjusted the brightness as needed and adjusted the width and height to soften the overhead shadows (I did this later as I was still playing around with how I wanted my brightness).

Process Screen #2 - Fill and Overhead Lighting
After adding those lights in particular, I was simply messing around with the brightness of the lights that I placed and I placed a shadow catcher to just experiment. I also added some omni lights where the candle flames are to give it more brightness and adjusted as I went through the process.

Process Screen #3 - Brightness Adjustments
After playing around with the brightness a lot (and still adjusted that a lot), I started playing around with camera effects. I actually became really surprised with the outcome of adjusting the depth of field, the bloom, and the tone mapping contrasts. I found it helpful during the process, and started utilizing the camera post effects to my advantage.

Process Screen #4 - Camera Effects
Here is where I started to play around with the width and height of the key and overhead lights as previously mentioned to get those shadows softened and played around some more with the light brightness and camera effects. At this point, I didn't move the angles of my lights and was pretty happy with the placement of them, but I may adjust that a little bit later (I'm duplicating some lights to see if the adjustments made on the duplicate would be better than the original).

Process Screen #5 - Shadow Softening
At this point, I began messing around with the exponential fog and found it helped with blending the outer edges of the flooring. I had 2 fog objects in the scene: one that was a deeper blue with very light opacity, and another that was extremely light with a more translucent appearance. I ended up changing this as I found it washed out the scene a good bit, and darkened up the fogs with a lighter/almost transparent opacity and a lighter blue instead of a white light fog.

Process Screen # 6 - Fog
I was still making adjustments to the brightness of my lights, camera effects and fog as needed. I adjusted the bloom effect where the candle lights are, and I increased the intensity of the omni candle lights themselves to help fill in some more light and (hopefully) give it more of a tavern look. I adjusted the fog and brightness even more as I still felt it washed out the scene a little bit (especially the desk in particular), but not nearly as bad as previously with the white fog. At this point, I feel the scene starting to come together, and it was all just some fine tuning and contrast adjustments that needed to be made.

Process Screen #7 - Fog Intensity, More Brightness and Contrasts
Here is where I'm at currently with the scene. I still think there needs to be some fine tuning and brightness adjustments to really fit that tavern like lighting scenario, but I'm overall happy with how this is turning out so far and where it is now. It's definitely been a journey with this piece, and lighting is one of my weak points (at least I definitely feel like it is), but it's all about practice, feedback and applying that feedback. I will be posting some more updates soon on where this is with lighting and hopefully get some final renders with Marmoset Toolbag 4 before moving on to Unreal Engine Early Access and messing around with the Lumen technology.

Process Screen #8 - Some Fine Tuning and Contrast Adjustments
I may not be able to post updates for about a week or two due to Hurricane Ida, but hopefully I can at least get some more lighting work done here. I'm also planning on getting a blog post up soon with a detailed breakdown on how I created my scrolls for this scene.
Box Modeling and High Poly Sculpting done in ZBrush
UVs done in Maya (fixed some box models in here as well)
Texturing done in Substance Painter
Lighting done in Marmoset Toolbag 4
2D Concept Art by Jenny D. Brown